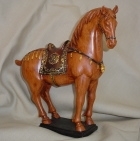
 Medieval Horse and Clothing
Home > Barding Hints > Reins
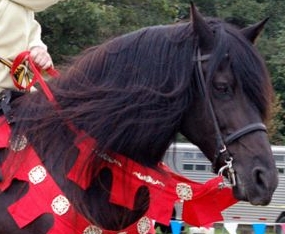
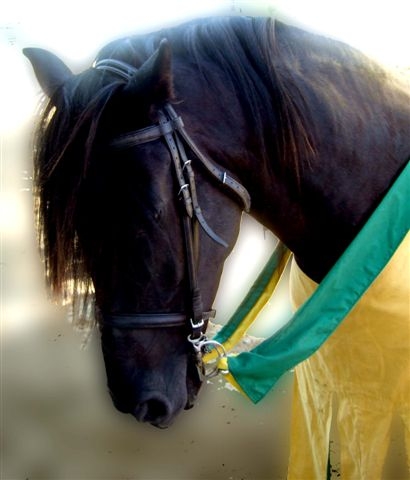
Easy Rein Covers
Rein covers are a quick way to give your horse outfit a medieval look. There were numerous dagging designs in a whole spectrum of colors that can be seen in period art work. Occasionally the whole bridle was covered in such designs, but many times only the reins were decorated. The most common bridle seen in period was a plain leather one, with leather reins. But judging by the variety of colors and the way the covered reins move, it is safe to assume that the material of choice for covers was some type of fabric. This makes our modern attempts much easier to accomplish, as most people can sew, or know of someone who can do it for them.
Using fabric covers on leather reins does have a major drawback. The covers will slide unless they are firmly attached at both ends. This means poking a hole in the center of the reins, which can weaken them. Tape could be used to attach the covers, but this looks tacky, is not very secure, and can leave a residue when removed. The other option is to make a complete slipcover for a closed rein, attaching both ends to the bit. But the cover can still slide on the rein, causing a poor grip.
In my method, I make a completely new set of reins using 1” nylon webbing. Webbing is strong, inexpensive, and can be sewn on a sturdy sewing machine. Use the webbing found at hardware stores, as the edges can be easily melted to eliminate fraying when cut. Snaps are sewn to the ends of the reins for easy attachment to the bit, and the covers can be sewn directly to the webbing, making a permanent covered rein. There is no slippage problem, your grip is sure, and the reins are very strong. (I haven’t had one come apart in 10 years.)
For a set of reins you will need the following:
2 trigger snaps (from hardware or tack store)
1 yard fabric (more if your dagging pattern is large or complicated)
Dual Duty Thread (plain polyester thread will break!)
2 small pieces of Velcro
1” webbing 7’ to 8 ½’ long (The shorter length is for decorative reins that only rest on the horse’s neck. In this case a regular set of leather reins is used for control.)
To start, measure the rein length you want for your horse. Compare it to your regular reins. Add 4” to the length, measure and cut the webbing in one long piece. Melt the cut ends with a flame. Thread 2” of the ends through the snaps, fold over and sew in a grid pattern, getting as close to the snap as possible.
Draw your dag pattern on stiff paper. Make it no more than 36” long, and at least 2”deep in the narrowest spots. Fold the fabric, wrong side out, and place the straight top of the pattern on the fold. Trace around the pattern with a pencil (use a yellow colored pencil if the fabric is dark). Cut out the dagging, adding an extra inch to each end and a half inch on the bottom side for a seam allowance. Make a second piece like the first. Finish the ends by opening the dagging pieces up, wrong side up, fold over the 1” seam allowance, turn half of that under again and stitch. Refold the dagging as before, wrong side out. Stitch on the lower pencil marks. Clip seams, turn, press, and topstitch the lower edge if you wish. You should end up with two tubes, the top edge straight and the bottom edge dagged.
Next step is to cover the center portion of the reins, where your hands hold. Lay the tubes on top of the webbing, lining up the front edges of the dagged covers with the tips of the snaps. Mark the webbing at the edge of the dagging. Measure the uncovered portion of webbing (between the marks) and add 2”. Cut a piece of fabric this length by 2 ½” wide. Use this piece to cover the center portion of the webbing by wrapping the fabric, right side out, around the section not covered by the dagged pieces. Make sure the marks on the webbing are covered with fabric. Fold the long raw edge under, and stitch close to the fold for the length of the fabric. The ends do not need to be turned under as the dagged pieces will cover them.
For the simplest method to finish the reins, slide the dagged covers over the rein ends, line up the top of the webbing with the straight folded area, line up the front of the cover with the end of the webbing and pin in place. Starting by the clip, stitch through both layers of the cover and the webbing. Where the cover ends in the center of the reins, stitch this end shut, sewing through the cover, the webbing, and the center strip. With this method, the snaps will be seen.
 In the alternate method, the dagged covers are lined up with the tips of the snaps, so the snaps are not seen when in use. You will need to make two straps, ¾” x 3” . Cut a piece of fabric 2”x 8”, fold wrong side out the long way, stitch ¼” from edge on the 8” side. Cut tube into two 4” pieces. Sew one end of each tube ½” from a raw end, trim seams and turn and press. Turn under ½” on the unfinished end and stitch. Sew a small piece of the fuzzy side of the Velcro to one end of each strap. Now look at your cover pieces. The small strap will be sewn to the front outside part (where it attaches to the bit and can be seen when looking at the horse). Place the non-velcroed end under the top part of this piece, Velcro facing down. Sew the strap in place, being careful to only sew through the one layer of the dagged piece. Flip the cover piece over. Fold the small strap over to the back side, leaving ¼” of space between the front dagging and the fold of the strap. Line up the hook side of the Velcro so it matches where the fuzzy side will lay. Sew the hook side onto the cover piece back. Slide the covers over the rein, so the strap is next to the snap. Line up the cover with the tip of the snap, so the snap is completely covered, and finish attaching as with the simple reins.
To use, simply clip the reins to the bit. For the alternate method, slide the strip through the bit as well and Velcro shut. The Velcro strip holds the cover in place over the snap, so it isn’t seen. This method works for making dagged bridles as well. Buckles can be used in place of snaps and are often found at tack shops or hardware stores. Use a soldering iron to melt holes in the webbing for the buckle.
Dressing up your horse's trappings in a medieval manner can be simple and colorful with these easy covered reins. Use a simple dag pattern or a complex one. Add embroidery embellishments or metal trim. They are quick to add to your regular bridle and washable, too. Make some for every horse!